


This past Sunday, we had an applesauce party of sorts.
What is an applesauce party, you ask? It’s when two or more people gather together to sauce some apples. In this case, Ruby Jon apples. None of us had ever had this particular cultivar, but I loved them. I think we all did. I ordered a bushel of them, along with some concord grapes, from a bulk food co-op called Bulk Natural Foods. They are the prettiest little apples, nearly perfectly round, with a dark ruby-red skin. Many also had a pink-marbled flesh. Gorgeous! And also tasty. Not mealy or too tart. And very few were bruised as well.

I canned the applesauce, as I often do, in my Granny’s kitchen.
Oh, how many memories have been made in the kitchens of grandmothers…
My cousins, Dee and his wife Emily, joined us as well. This was Emily’s first time ever to can! She jumped right in and was a huge help. She probably peeled more apples than I did, and I know she filled more cans.
Of course, I got asked twice — once by each parent — why I was making her do all the work. The answer was that she asked to! Some people are hands-on learners, and really, there is no better way to learn than by doing. So, do she did.

By the way, if you don’t have one (or two) of these amazing apple peeler-corer-slicer doohickeys, you need one. Like, yesterday. They rock and roll. There’s no telling how much time they have saved me, and will save me, over the years.
Of course, having some help makes the work go faster, both literally and in the sense that chatting makes time fly. Working with more people around made me nostalgic for when when people would come together during harvest season and help each other preserve the food. (I believe they still do this in Amish communities.) Once upon a time when more people raised food, there was more sharing of the work and the harvest.
But enough nostalgia! Let’s talk about applesauce.
Applesauce is incredibly easy to make and can. I’ve even made small batches in the crock pot before, to freeze. People often recommend starting with jams, jellies, or pickles if you’re new to canning, but believe me…applesauce is so much easier! Pickles will go soft and jams and jellies are deceptively easy to mess up. I have had them fail to set, and I’ve also had one batch that came out like a rock. Seriously. Couldn’t even get it out of the jar! I had to throw it away, jar and all.
But applesauce is very forgiving. It doesn’t need to set, so there’s no worrying about cooking the right amount of time, testing for sheeting, pectin, etc. It’s perfect for a beginner.

Here’s the Recipe:
Tools:
– large stainless steel pot
– waterbath canner and supplies
– rags and pot holders
– potato masher (optional, see method #1 below)
– wooden or enamel spoon, a ladle, and a knife
– pint jars and lids
– blender (optional, see method #2 below)
Ingredients:
– approximately 12 lbs apples. This does not have to be exact.
– 4 tablespoons lemon juice, plus 1-2 cups for soaking
– cinnamon to taste, if you desire — I added 2 tablespoons to my cinnamon batch
– sugar to taste, if you desire (I like sugar free, personally)
– water
Instructions:
First things first — set up your waterbath canner to boil. It will take a while to get to boiling, depending on your stove.
Start by sorting, peeling, coring, and slicing your apples. Save the peels and cores in gallon zip lock bags and stick them in the freezer — we will make jelly with these later. Cut away and discard any bruised spots.

One of the most important steps to getting a pretty applesauce is a lemon juice soak. Brown apples do not a pretty sauce make. Drizzle the peels and cores with lemon juice as you collect them — toss to be sure they are coated.
For the apples to themselves, fill your pot or a large bowl with a water lemon juice mixture consisting of 1/4 cup lemon juice to every two cups of water. Chunk those babies in the mixture and be sure they all are submerged (or at least get submerged before floating to the top). This is less important if you will be adding cinnamon to your applesauce, as cinnamon will discolor it to a light brown shade, but if making plain you want to retain that color.

Once you have all your apples peeled, cored, and sliced, drain off the lemon juice water. Add just enough water back to the pot to prevent sticking, and then heat the apples over medium-high heat until they start to boil. They will start to release their own juices and reduce. Stir frequently to prevent sticking.
Reduce heat and continue to gently boil until the apples become tender and start to break apart easily. From here you will proceed to either method #1 or method #2:
Method #1:
If you don’t mind a slightly chunky applesauce that isn’t as smooth and runny as store-bought, you can pulverize your apples with a potato masher. The older style kind with a solid base with holes will work better than the kind with zig-zag metal wires. I’m sure there are fancy words distinguishing these two styles, but at the moment I can’t think of them.

This will require a little more elbow grease and patience. The result will be a more meaty applesauce with a few chunks here and there. This is how we did our first batch of applesauce.
Method #2:
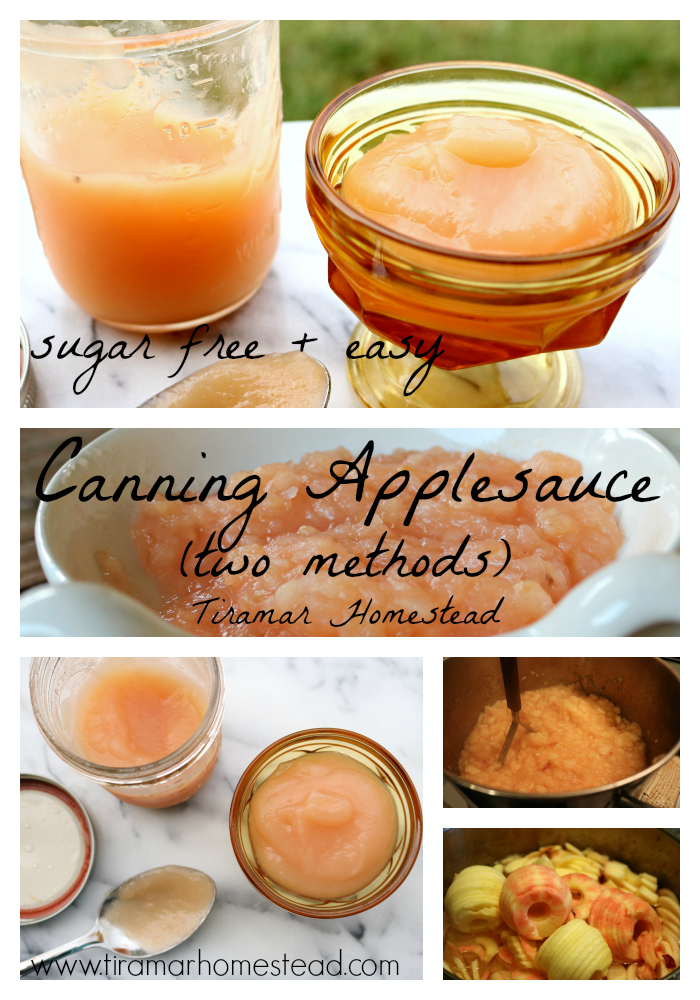
If you prefer a smoother texture like that which you find on store shelves, go ahead and run your applesauce through a blender in batches until it reaches the consistency you want. (You may also use a food mill in place of a blender.) Be very careful of splatter as the applesauce is HOT. This is how I did the last two batches of applesauce. I personally prefer this method, because I love the velvety texture. See the texture difference in the image below?
Once all your applesauce is blended, return to the pot and proceed with the next steps.

At this point you will add the lemon juice, cinnamon, and sugar if you prefer to the applesauce and mix well. I did a couple of batches without cinnamon and one with. Personally I prefer cinnamon, but my dad does not. I did not use sugar in any of my applesauce. It would just mask the natural sweetness and subtle tartness of the apples!
Now it’s time to prepare your applesauce for storage. This recipe makes too much to keep in the fridge, so you will either need to allow it cool and freeze it or waterbath can it. I chose to can it, as our freezer is too full as it is! I have frozen applesauce in smaller batches before, however, and it will retain its texture nicely when thawed.
If waterbath canning, continue to keep the applesauce at a low boil while filling your jars. Follow basic waterbath procedures. The proper canning time can vary by altitude, so I always like to recommend following the Ball guidelines for you area. I particularly like the Ball Complete Book of Canning — it has all the appropriate guidelines and safety practices as well as many recipes.
Once your jars have processed, sit back and wait for the ping. I love these candid images I caught of my cousin, Emily, impatiently waiting for and then hearing her very first PING. It’s always exciting to hear those jars seal, but never more than the first time!


This recipe will yield 7 – 8 pints. A single bushel made three batches and about 22 pints of applesauce. After we did the first batch Sunday night, I came back on Monday and finished up with two more batches — one more with cinnamon and one more without. For these two batches I used the blender.
Oh, and if you use Ruby Jon apples and omit cinnamon, it will even be a little pink!

Cheers
Thanks for this tutorial! I love the pics and the personal feel, like I’m spending time with you in the kitchen. We have a bunch of apples to use, so I’ll be making applesauce. Cheers!
Thanks, Joy!